
One thing I don't think I've blogged about yet is our bathroom. Where to begin... it's small, no storage, terrible plaster job, very ugly blue "tile". The toilet is very close to the tub leaving a huge amount of useless space betweent the toilet and the plumbing wall. The pedistal sink is in an okay spot and we like it quite a bit, the only problem being is that 1) it being a pedistal sink means no storage, and 2) the door hits the bowl but because of the size of the room and original layout- it can't be placed anywhere else. Looking up from the basement we can see where the original pipes were and that the POs moved the tub about 9" away from the exterior wall, leaving a large void. This is the one and only bathroom (at the moment) so doing a complete reno at the moment is not possible.
So what do I do? Put my skills to work. The blue that the POs painted (found out they didn't prime the greenboard when I removed the really ugly shelf they glued to the wall... yikes!) is a very nice soft colour so I used it as a base for what I was about to do. I used the really ugly medicine cabinet as a starting point of where the "tile" would go. Since we are going to eventually put 3x6" white subway tile with a black bullnose border that's the pattern I painted. It took an entire morning just to do the taping. We already had the white kitchen/bath paint on hand so once I was finished taping out all the tiles I slapped on the white. Now, because the POs didn't prime, of course there was some rippage, and they painted after everything was in... Man, I hate it when people take stupid shortcuts like that but then again, these are the same POs that painted latex over oil... the darker blue that you see below is as close as I could get to matching the existing colour.
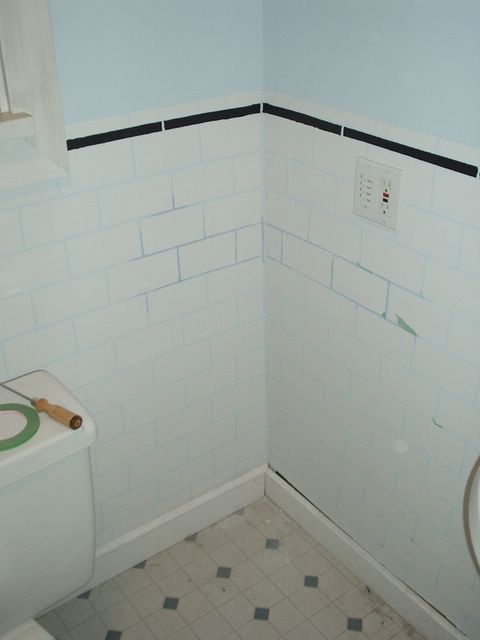
I used some of my black craft paint for the border and some visitors thought the tile was real! On the top half of the walls I picked up some silver latex and glaze, which i mixed 4 parts glaze to 1 part paint, painted it on the walls and dragged a stiff dry brush down, creating silveryblue striae effect. All in all I'm quite happy with how it's turned out and it gives us a really good idea of how it will look when it is real.
Thank you Debbie Travis! (also check out Facelift)
Thursday, May 12, 2005
The Bathroom
Subscribe to:
Post Comments (Atom)


3 comments:
That looks great!
thanks! it looks much better irl and the striae shows the crappy job the POs did on the drywalling... ah well...
What a cool idea! Looks great!
Post a Comment