Showing posts with label workshop. Show all posts

Saturday, November 27, 2010

Spucing up the workshop


I've had the top for this router table for almost a year, so I finally started building a base for it. Here I am, finishing off the drawer. I'm going to add another drawer, but one should do for now.


Here's the router table with the Lee Valley top and fence. I build it out of scrap I had lying around. The melamine and pine are taken out of our bedroom when we demoed it. The case for the router fits perfectly at the bottom (I didn't even plan it that way). There's room for another drawer, when I get the time to use it. I'm still getting used to the router table, figuring out how not to get tear out etc. I want to customise the fence, so I can mount some featherboards on it. It seems really precise, almost more precise than I need. There is micro-adjust on the fence that moves it in thousandths of an inch!
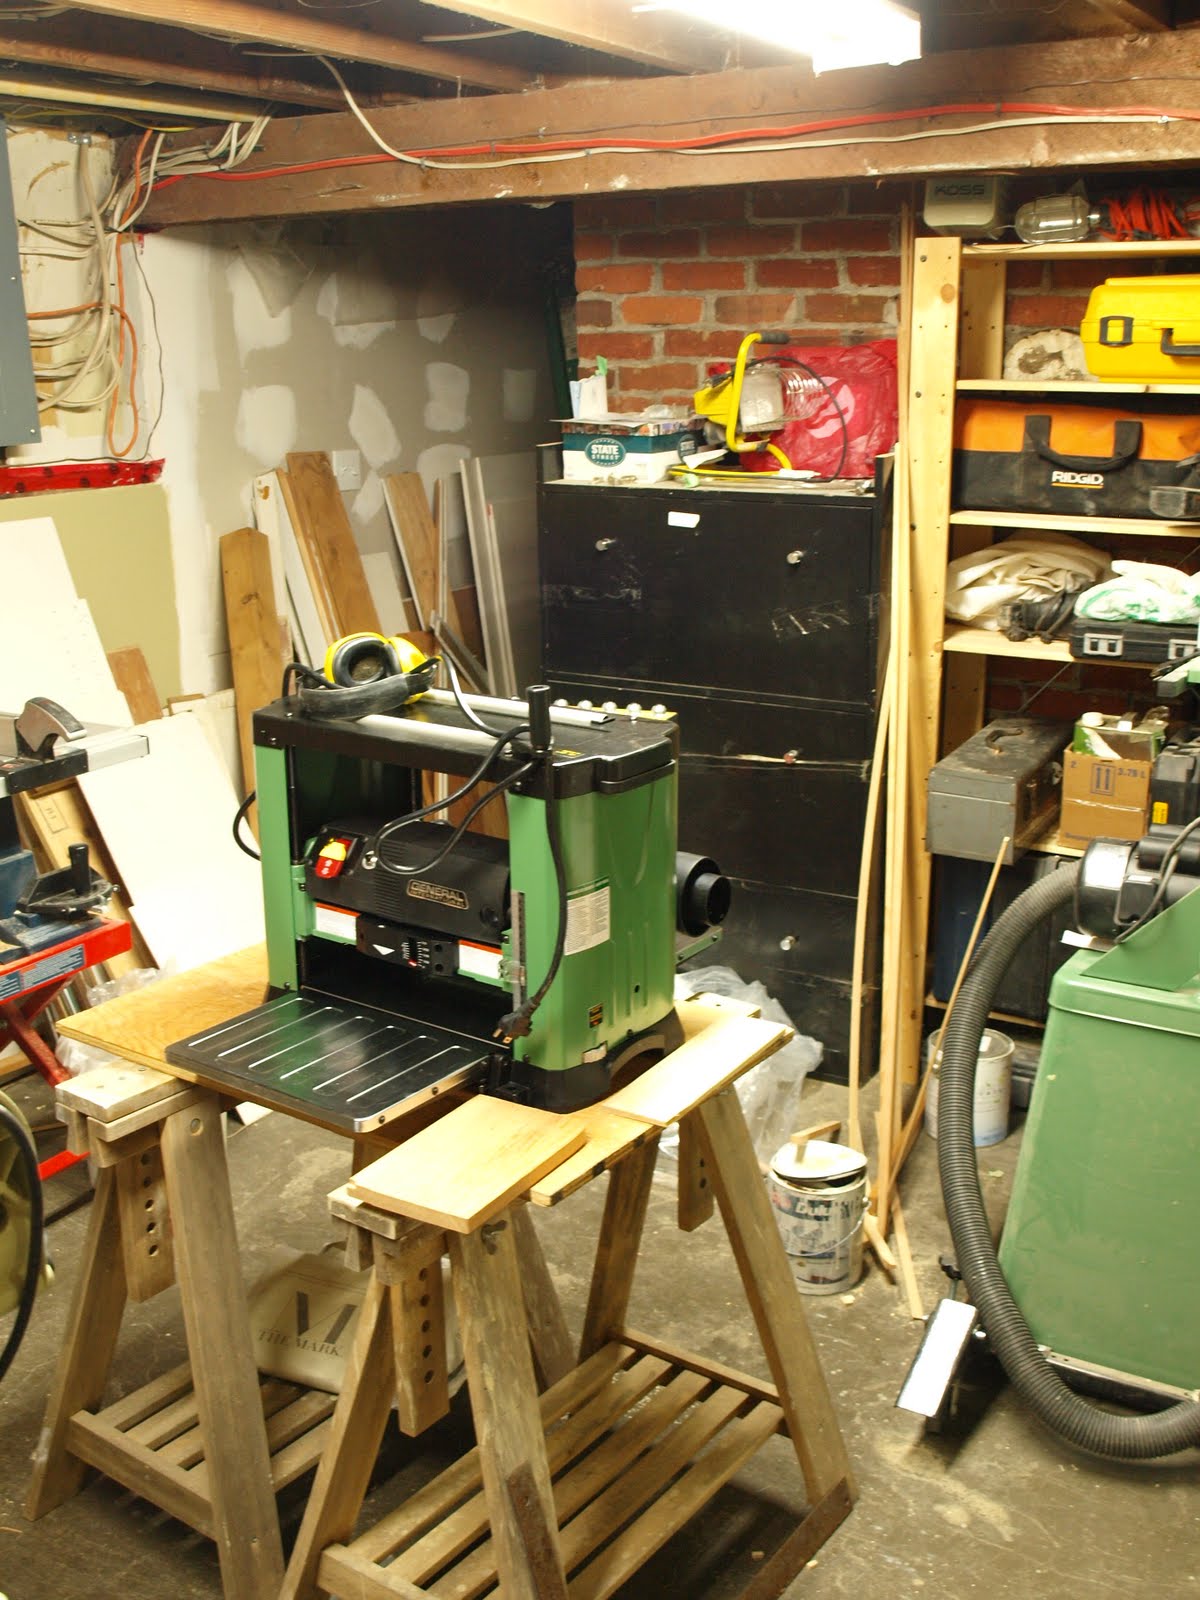

This the portable planer I just got today, it's General International. I need to make some 1" thick trim, for above the doors. I made a small test piece today, using the bandsaw to cut to 1-1/16", then planing the remaining 1/16' off. The finish looked really smooth, but I've heard you still need to sand, otherwise marks show up, when you put the finish on. It had a dust collector, to collect the chips.


I also go this contraption, the Dust Deputy. It works with your shop vac, and had cyclonic action. It collects 99% of the dust, before it gets to the vacuum. I've only used it today, but so far so good. It's a lot easier to empty the bucket than the vacuum as well.
I got a couple new blades for the bandsaw too. A 3/4" thin kerf blade for resawing, and 1/4" blade for cutting curves. I tried the 3/4" blade today, and it worked great. I set the fence for the new blade (you need to do that for every blade), and it cut great. We'll see how it goes with resawing a 6' piece.
I'm going to build a base for the planer too, eventually. I'm going to build it as an extension table for the tablesaw, and then store the planer in there when I'm not using it. I'd like to build some drawers under the workbench as well. The shop is small, but it could be a lot more organized. It gets a little better every year.

Thursday, January 29, 2009

Working on the Workshop


Here's a picture of the floor after scraping, and with the primer on it. I scraped all the old paint off with a carbide scraper. Most of it was already loose and peeling. I didn't get all of it off, and they say to get it all off. We'll see if it makes a difference. After scraping, I used the degreaser, it was really hard to rince off. They say for best results, to wash it off with a pressure washer. Well, I'm not going to use a pressure washer in the basement. So it took me over an hour to rinse and clean if off with a bucket and mop. Next came the primer which was relatively simple. The work bench is still in there, because it was too wide to fit through the door. I'll have to move it, and then do that part later.


Here's all the stuff from the shop, in an adjacent room. Including my new band saw.


Here's a shot of the power tool bench. The floor colour is called Fedora. It looks good with the wall colour, Mochachino. It looks a lot better than the red and tan that was on there before.


I still have some drywalling to do, I want to get the foam covered since it's not that safe. There's some pipes in the way though, and we're planning on replacing the main pipe to the house, so we'll have to be doing all that soon enough. As well, we're supposed to have 3/4" pipe to the water heater, so we have to do a bit of plumbing. Once the walls are done, I can start hanging and organizing everything properly. Hopefully we'll have a working workshop soon enough.

Thursday, January 15, 2009

New Foyer Light


We just put it up last night, it's from Rejuvenation. It's a Timberline pendant. Deb helped me put it up, I didn't want to drop it. The escutcheon doesn't quite touch the ceiling, I guess the box is sticking out a little too far (only about 1/8"). We got a good deal on it, because they had a sale on them with the energy efficient bulbs. We planned on using them anyways, so it wasn't a big deal. Our dollar isn't doing that well, so it was still expensive though.


Here's the old light in it's new place. I don't know if this light is original to the house or not. The wiring seems old, it's all braided wire, so I rewired it while I had it down. I put new bulb holders in as well. It's a really hard light to get on, and I got more than a little frustrated. I finally got the holes to line up.


I've been working on the basement floor as well. I've been feathering out the patch I did earlier with a topping. I used a concrete primer, and bonding concrete topping. I don't have the concrete trowel I used to have, so I had to make due with a tiling trowel. It looks better than it did. I'm scraping the floor, it has a few coats of paint on it. I'm using a carbide scraper, and I've got it about half scraped. I have to wait a while to prime and paint the floor anyways, until the concrete cures. It's a faster curing concrete, so a couple weeks should be good. I forgot to get primer when I got the paint, so I need to go back and get that anyways. I finished one of the shelves and things are getting more organized down there. Hopefully it'll be cleaned up enough to start some new projects (or finish off some of the ones that are already started).

Saturday, January 3, 2009

Working on the Workshop


Here's the stairwell to the shop. I finished drywalling it, and it's got a coat of paint on it now. The top is plaster that isn't in very good condition. I'm going to have to use plaster washers to resecure it. I'm going to trim it out with rough cedar, to give it kind of a rough look.


I've been drywalling the shop, and moved the bench I use for power tools. The table top is cut to fit in this niche. It's attached to a ledger at the back, and to the cabinet. I'm going to build shelves on both sides, and above. Hopefully it's going to be more organized.


Here's the wall on the other side, that I haven't finished yet. I have to change some of the plumbing so I can finish drywalling the one wall. I ran out of Tuck Tape too, and I didn't feel like going out in the snow again. I'm going to build shelves, and places to hand all my hand tools, like chisels and planes.


There was a wall build about 2' in front of the chimney, so I removed that, and continued the wall along beside the chimney. The 2' was kind of wasted space, so I reclaimed it for the shop.


This shows the corner by the stairwell. We're going to store paint under the stairs, to free up more space in the shop. It's separated from the furnace now, so hopefully less dust in the furnace. I want to get a better dust collection system than the shop-vac, eventually.


It been taking a long time to work on the shop, there's no place to put everything while working, so it's been a juggling act. Hopefully I can start on the shelving and organizing, it'll be nice to finally have some organization.


Tuesday, January 29, 2008

Armoire progress

I've got the armoire I'm making mostly put together, I've been working on it a lot the last 2 weeks. I've managed to remedy most of the mistakes I've made. A lot of the problems come from the fact that the plans call for non standard sized lumber, and I made mistakes trying to alter the plans. It would have been easier to buy bigger lumber and cut it down to size, it would have been a lot more expensive though. A lot of the lumber was cupped, I'd be a lot more careful choosing lumber next time. I guess it's difficult to get good pine these days. The pine beetle infestation probably doesn't help the selection of trees. It has to come apart to make it up the stairs, so the pieces are attached using screws. I used the pocket hole jig for a lot of the connections, and to make the back. I probably could have just used a piece of plywood for the back. I followed the plans though. I'm going to brad nail the back on, it's easy enough to pull the nails out, if we need to move it again. It seems a lot bigger than I imagined, it takes up almost all of my small workshop. I have to tip it on it's back, so I can do the hinges for the doors, the hinges seem a little small, now that I've got them home, I'll change them if they don't survive. I tested the stain we're using on a scrap piece of lumber, we're going to cover that with a couple coats of shellac.

Friday, January 4, 2008

Workbench


I've had the top and the vice for over a year, so I decided to build my workbench. It's for using hand tools like chisels and planes, I have another bench to use power tools on. The top and vice are from Lee Valley, I made the base out of maple. I've never worked with maple before, it's a lot harder than fir. My tablesaw was having problems cutting it, and my drillpress was having problems drilling it. I couldn't find any stock thicker than 1.25", so glued up those to make the trestle legs. I mortised the legs in to the base piece, I drilled holes, then cleaned it up with chisels. It was hard work with hand tools and maple. The stretchers are 3/4" x 6", and are held together with bed bolt, like a lot of flat pack furniture uses, that way it can be taken apart. I made the jaws for the vice out of scrap, I think I have to redo them, the holes aren't quite in the right spot, the dimensions were in metric, and I made a mistake somewhere. I'd like the jaws to be a little wider anyways. I have the handle for the vice somewhere. I have a tail vice that I'm going to put on as well, once I figure out how to put it on. I need more maple, and it's a little pricey, so I think I'll wait. Next is cleaning up and reorganizing the shop. Then I'll start building some furniture, hopefully it'll be a little easier with the new bench. I still need to put some finish on the legs. I'm going to get some adjustable feet as well.

Sunday, February 11, 2007

Basement Walls


This is what the workshop looked like 2 weeks ago.


This is what it looked like a week ago, and how it looks now. At least it's functional again. The walls are insulated, and the cabinet is rehung.

We rented a van on Saturday, to get rid of all the old drywall we had. I had to drive it out to the dump that's further away, and that accept drywall. Did take too long a couple hours maybe. It felt good to get rid of it, and now we have a lot more space in the garage. Then since I had the van, I picked up 12 more sheets of drywall. Hopefully enough to finish the rest of the basement.


Not exactly thrilling photos. It's really hard hanging drywall by yourself, Deb has a deadline, so I did three sheets by myself. You get it in the perfect spot, and juggle the screw gun, and the screws, and by the time you get it all lined up, it slips by the time you go to put a screw in. It's a little frustrating. I'm sure I could have screwed a couple pieces of 2x4 on the wall in the perfect place, and it would have been a lot easier. I guess sometimes it's just easier to struggle. This area is going to be for Deb to do her stained glass work. She's been itching to do some, but the basement has been in complete disarray for quite some time. There's going to be a small powder room wedged in there as well.


I was working on the bottom section, but I broke 2 concrete bits, so I called it a day. I'm drilling in to the concrete, and using galvanized nails with wire, to hold various thicknesses of wood to the insulation. That way, the insulation is continuous on the concrete. I need to get a couple new bits, then I can continue. Hopefully I don't break anymore, they're not cheap.

Monday, February 5, 2007

Weekend, Workshop and Sealing up the Cracks

It started on Saturday, with more work on the Energuide stuff. I bought all the weatherstripping a while back, I go the medium thickness and the extra thick stuff. If I were to do the hatches again, I would make the frames, and put the doors in them in the workshop, and get everything so it closes nicely, and seals properly. Instead, we did the doors first, then built frames that fit in the opening after. It works pretty good on 2 of the doors, on the other one, I had to cut tapered pieces, and use various thicknesses of weatherstripping, and it still doesn't seal that good. I got the hatches sealed up pretty good though, I had to use plier to pull them shut, so I could get the lock in. I think the weather stripping will compress over time though. I'll probably have to put handles on them though, I'm thinking.
The ceiling in Seth's room is bevel board (it's like a plainer version of beadboard), so I've been caulking the joints with latex caulk. I've just been doing where it changes angle, and where it meets the drywall. I still have a bit to do on that. The upstairs is pretty much finished after that. It would nice to add more insulation in the attic, but we're going to be taking out the crappy drywall job that the previous owner did, so if we did cellulose, it would all just fall out. I need to add soffit vents, and those pieces so the insulation doesn't cover them as well, so I don't think we have time either.
I finished insulating the basement as well. All except for one bay. I want to replace the spigot, with one of the anti-siphon/frost-free ones. We only have R4 on the concrete portions of the walls in the workshop, it's a lot better than nothing. I nailed strips of plywood, sandwiching the foam insulation, to attach the drywall. I used a hammer drill, galvanized nails, and pieces of wire. It really hold the pieces on tight, and it's a lot easier/cheaper than tapcons. I put up 2 pieces of drywall, enough that I could put the workshop back together. I rehung the cabinet on the wall, and moved the location of the workbench. The layout seems a lot better, the workbench isn't right in the path of the laundry room. The outlets are too low on the wall with shelving now though, so I'll have to figure that out. I spent probably half of Sunday reorganizing the shop, there's still a long ways to go. I can start designing my other workbench soon. I aready have the top and vises, I need to get some wood to make the base. I guess it would all make more sense with pictures, I'll take some soon.

Sunday, January 28, 2007

Upstairs door finished, and energuide progress

Here's some pics of the door I just refinished. It turned out pretty good, there's still some paint residue, that I'd like to get rid of eventually. The painters tape ripped the paint right off the wall as well. I knew painting first was the wrong order, we were just so sick of the wallpaper glue walls.


The hardware turned out really nice. This the second door finished in the hall, I think the other one was finished almost 2 years ago. Only 2 more to go, the bathroom and the bedroom. We can't really leave those ones off, so they'll be more difficult to finish.


I've been working on sealing up the attic hatches as well. The doors were done, they needed frames though. So I built 3 frames and installed those, using my new brad nailer. I measured the frames for the one with the thicker walls, it has a layer of 3/4" wood, then 3/8" drywall, and the door was mounted behind. So the other hatches, the frame is sticking out. I'm going to have to get creative with the trim. At least it's just in the kid play room. I would have bought 4" wood for those frames, and then ripped them down. I guess I should have measured them all. Now we just have to spray foam around the gaps, and add weather stripping to all the attic hatches.

I took the 1/4" plywood of the last wall in the workshop as well. I took the insulation out as well, even though it didn't look that old. I prefer the roxul insulation, since it's partially and air barrier, it's fire resistant, and has a higher R value. It looks like they had some rot on this wall, it's all been replaced, it looks like maybe 10 years ago. There is a mystery pipe coming out of the wall too. I think there may have been an oil tank in this room at one point. There was an underground tank in the backyard as well, that's been removed. I thought I could smell a little bit of residual fuel oil. And when I moved the shelf away from the wall, I noticed some condensation. It doesn't look like there was a major leak. I've already fixed the draintile on 2 sides, looks like the front is next. I think it has draintile, I don't think they damproofed the wall though. So we'll have to dig it out, parge it with mortar, and cover it with tar. We have to dig in the front anyways, so it's not that much extra digging. We still have the galvanized supply pipe, that needs to be replaced. I have to call the city, and see what's involved in that. I can't even see where it turns off, since it's been buried at some point. So I guess we've had a busy weekend here, still a long ways to go. I need to book an energuide appointment, I'll book 2 or 3 weeks from now, so we can get it all done.